Converting a photo to Cartoon is a highly requested operation because it allows you to obtain very nice images (and also artistic) that people love to share on different social channels or send via Whatsapp to friends and relatives or use them as avatars of own web profiles. It is not difficult to transform a photograph into an apparently hand-drawn comic, and below we will see how to use PhotoShop for this operation. Photoshop is the industry's leading software and with it you can manipulate and edit a photo or image in every possible and imaginable way. Here are the steps to follow to convert photos to cartoon or comics with Photoshop.
Open Photoshop on your computer and open the photo in it. We have used the following picture for this tutorial:

If you have the Photoshop CC version, go to the menu Select> Object to crop the photo. If you have an older version, start with the Quick Select tool and edit the crop using Select and Mask / Refine Edge (depending on Photoshop version). Use Command / Ctrl J to create a new layer from the selection and add a white background on a separate layer.
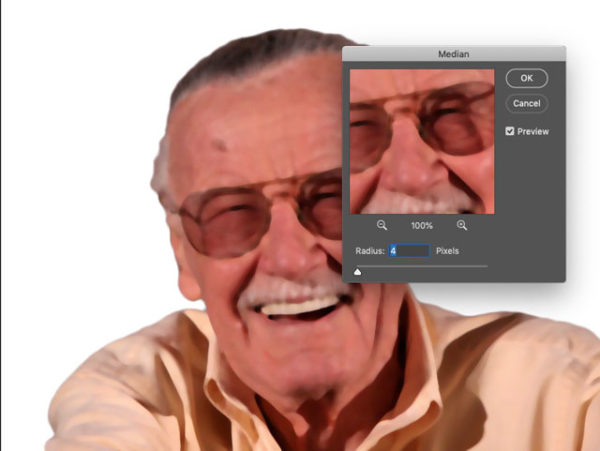
Instead of using the Threshold function, first use Filter> Noise> Median to soften the picture. You can use a 4 pixel radius. Unlike Gaussian blur, this softens the photo while keeping the edges crisp.

Go to Layer> New Adjustment Layer> Threshold to add threshold adjustment. Now that the median filter has been applied, the effect is much more fluid. remove all color from the cropping layer using Image> Adjustments> Desaturation.

Since we are analyzing the Threshold setting down to the level below, we can modify the base level while we see the final effect. Use the Burn tool set to Highlight to darken the edges of the shirt, to give it a definition; hold Alt / Option to temporarily get the Dodge tool and use it to illuminate areas that are too dark as inside the glasses. Take your time on this step, referring to the original so that you can get the shape of the nose and other correct characteristics.

Select a base level by holding down Command / Ctrl and clicking on its thumbnail in the Layers panel. Then create a new level by setting its mode to Multiply.

Choose a skin color and use Option / Alt + Backspace to fill the selection with that color. Then deselect and use the / button to lock the transparency of this layer so you can't inadvertently paint on the edges.

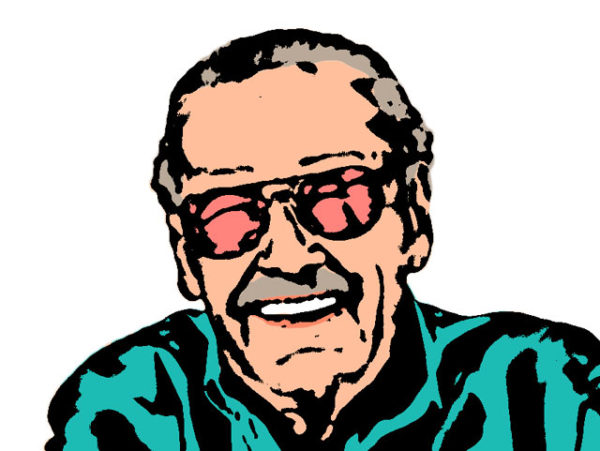
Paint on the color layer using appropriate colors for mustache and hair, glasses and shirt. Paint the area of the teeth in pure white. So far it looks OK, but the Threshold filter produces uneven edges. We will fix it later.

Hide the color layer and use Command-Shift-Option + E / Ctrl-Shift-Alt + E to create a merged copy of the entire image. If you wish, you can reveal the color layer, but be sure to work on the newly created merged layer. Use Filter> Blur> Gaussian Blur to soften the image.

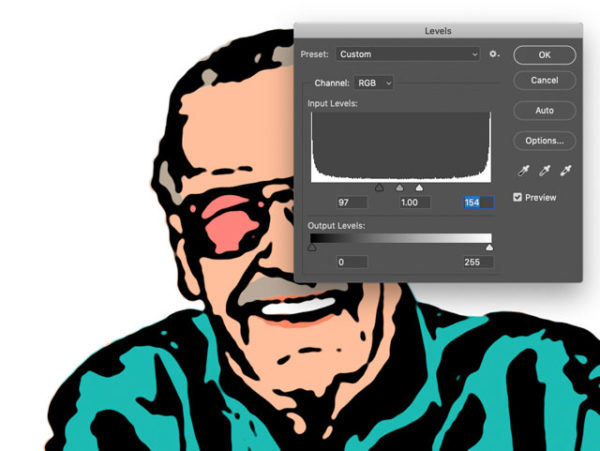
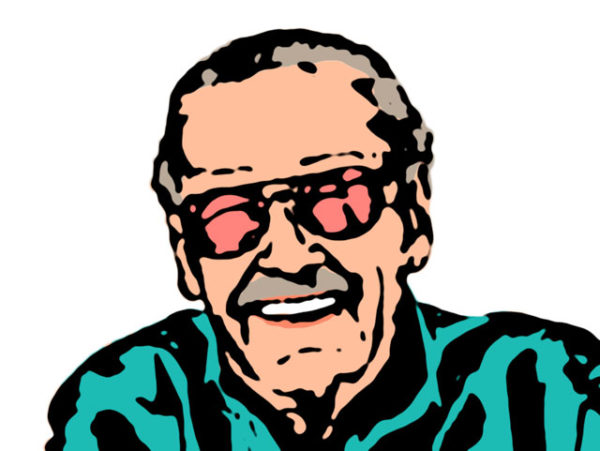
The softening of the edges predictably produces a blurred result. To solve this problem, open Layer> Adjustments> Levels and in the Input Levels section drag the white and black triangles towards the center. This narrows the blur, producing soft shapes. Don't drag them all the way to the center or you'll still get jagged edges.

Well, we're done. In these 10 steps you will have converted the photo into cartoon with excellent results.
